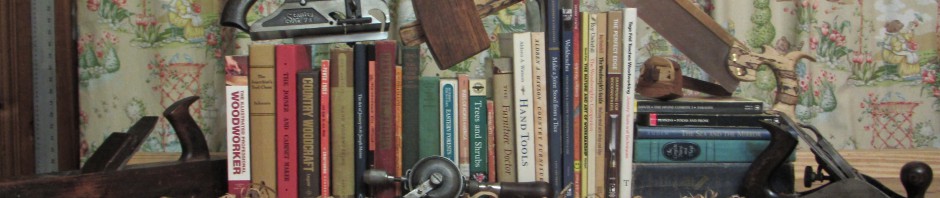
Ten years ago, I was collecting hand tools at a rapid rate. I had most of them tucked into various crates and tool boxes, but others were just sitting on the benchtop because I had no better place to store them. I was in serious need of some real, permanent tool storage.
At that time, Chris Schwarz had recently published The Anarchist’s Tool Chest, a book I devoured. In the book, Schwarz shows how to build a complete kit of joinery tools, as well as a tool chest to store them in.
So in the summer of 2012, I set out to build my own version of that tool chest. I constructed mine a little differently from Schwarz’s, however. Schwarz opts for a dovetailed carcass made from pine, and he paints the whole thing. It’s not supposed to be fine furniture, he argues, so there’s no need for fancy wood and decorative details. In principle, I agreed with him.
And yet…..
My situation was different. I didn’t have access to good softwood in the right thickness and didn’t know where to get any. (I had yet to discover some local hardwood suppliers.) But I did have some really lovely wood on hand that I wanted to keep near me. I had some quartersawn cherry from a tree grown locally, as well as some spalted pecan wood from a neighbor’s tree that I had sawn and dried myself. Plus, my workspace is in my dining room, so I the whole family was going to see this tool chest every single day. I wanted it to be easy on the eyes.
This is the tool chest I built:

And I still am happy with it. After having worked out of it for nearly a decade, there is really nothing about this tool chest that I would change.
Now here is how the chest looks after a decade of use:

The cherry frame has darkened nicely, and the Danish-oil finish is fairly dull now, but it still sets off the spalted pecan panels nicely. The chest rolls on swiveling casters that are concealed by the lower skirt. I wore out one set of cheap casters a few years ago (the urethane tires disintegrated) and replaced them, but otherwise the chest has undergone no maintenance whatsoever.

Opening up the chest, you will find two sliding trays. The top one is fairly shallow and houses block planes and layout tools–as well as some carving gouges (currently). The top tray is for small tools I frequently need to grab quickly. The lower tray is deeper and holds bulkier tools like marking gauges, hatchets, spokeshaves, and more layout tools.
The beauty of the sliding trays is that storage is flexible. I have been working on a lot of wooden spoons and bowls recently, so I’ve placed my carving gouges in the uppermost tray for ease of use. When I turn back to joinery, as I often do in the summer, those can get stowed in the lower tray to make more space for layout tools in the upper tray.
Because one tray slides underneath the other, they can both be visible and accessible at the same time. Or I can slide the lower tray underneath the upper tray to access the bottom of the chest.

The bottom of the chest holds larger tools, especially hand planes, joinery planes (all wrapped up in bags and cloths), my rasp-and-file roll, and mallets. Oh yeah, and a couple notebooks I keep for sketching out designs.
There is also a saw till that holds two handsaws, one for crosscutting and one for ripping, as well as a tenon saw. Up against the front of the chest are all my chisels, as well as my two main joinery saws–a dovetail saw and a carcass saw. The saw and chisel rack enables me to pull out these tools one or two at a time, use them, and immediately put them away so they don’t clutter the benchtop.
The above picture was taken with the two sliding trays removed, but all of this is accessible when I just slide the trays forward or back. The chisel rack is accessible at all times.
You would think that I’d have to stoop down a lot to reach items near the bottom of the chest, but I really don’t. Because the chest is up on casters, and most of the tools at the bottom are fairly tall, I almost never have to reach down to touch the very bottom of the chest.
And when I’m done, I put everything back and close the lid. The chest rolls right under the overhang of my workbench, where it’s out of the way but not out of sight.

I do have quite a few more hand tools than fit into the chest. I have a number of additional hand saws and hand drills/braces stored in wall-mounted racks, for example. But I could theoretically store every one of my essential tools in this chest if I had to.
To date, my tool chest is still one of the most satisfying projects I have ever built.

Thanks for sharing and providing a long term update. I’ve made a half size in length and width (so 1/8th volume) ATC. I’m planning to make a full sized one. It will likely be very similar on the inside to what you have done. I really like the rack in the back.
I haven’t settled on what wood to make it out of. I might let the universe decided and see if I can’t find some really wide wood so I don’t need to glue up pieces for the carcass. All good problems to have.
Great to see you are still satisfied with that tool chest design after all those years. I see a dutch tool chest in the background. How do they compare for you?
Cheers, Fred
The Dutch tool chest belongs to my daughter, so I haven’t really worked out of it. My main impression, though, is that you can’t work out of it when it’s on the floor. It needs to be set up on a bench or something, otherwise it’s very difficult to get things out of the bottom. The top, I feel, gets too cluttered, and I much prefer my sliding trays.
I have no doubt that it could be organized and used effectively, but I think the design accommodates a smaller toolkit than the English-style chest I have.
I bet you only open a wine bottle when needed for protecting a new gauge…LOL
Wine corks are useful like that. The synthetic ones are especially nice.
Gorgeous chest! That has aged and has taken on great color.
Thanks! I think so, too.