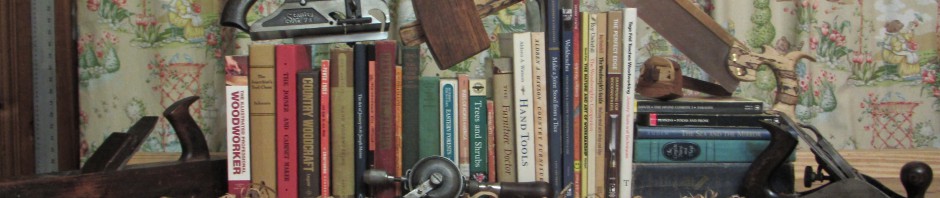
As a self-professed bibliophile, one of my recurring projects is the bookshelf. My bookshelves are usually designed around a simple dado joint, which joins the shelves to the uprights. For some time, I struggled to cut dado joints with a crosscut backsaw, but the size of the saw (16″ long) relative to the size of the joint (usually 8″ long) made the job awkward.
Then a friend of mine, Dominic at TGIAG Toolworks, decided to make some stair-saw kits, and I bought one of the first he produced. The stair saw is an ideal tool for cutting dadoes, because the body of the saw acts as a depth-stop, allowing the saw to make repeated cuts at a very precise depth.
Here is the finished product:

Building the Stair Saw
The kit came with an 8″ saw plate, pre-toothed and slotted, as well as two saw nuts. Dominic offers pre-sized wood blanks for the body of the saw, but I opted to use some of my own wood.

The first step was to select the stock. Well-seasoned wood is crucial, because any warping of the wood will make the saw unusable. I prefer to use quarter-sawn stock, which is stable and less prone to warping. This project requires a board at least 4 1/2″ wide, and ideally closer to 5″ wide, by 7/8″ thick. Practically any hardwood will do, but it should be something that shapes and smooths relatively well. Walnut, hard maple, fruit woods, or some of the exotics would be good choices. However, I decided to use some spalted pecan–a product of a bit of urban timber salvage I did last year–because (a) I’m used to working with it, and (b) I had a nice looking piece on hand. Its resistance to splitting was another advantage. If I drop it on a hard floor, the horns on the handle are unlikely to break off.
The instructions that came with the saw were very precise, although I still felt free to improvise a little on the pattern. I made the saw body about 1/4″ taller than the template called for. I wanted to be able to make very shallow cuts, and I didn’t want the kerf for the blade to extend too far up into the saw’s body. I also made the horns just a little longer than called for, since I had the extra material to work with.
The easiest way to get the curves in the handle is to drill the blank with different sized bits. I taped the pattern securely to the wood, marked the location of each hole, took the pattern back off, and drilled my holes at the drill press with forstner bits. I had most of the sizes called for, but on a couple holes I had to make do with the next smallest size. It wasn’t a problem in the long run. Then I cut away as much waste as I could on the bandsaw without changing out the 3/4″ blade. That wasn’t a whole lot, but it helped.

The holes for the nuts must be drilled very precisely or they won’t line up with the slots on the saw plate. This is how it looks roughed-out.
Next I sawed the kerf for the blade to fit in. This has to be done right, or the whole thing is a bust. So I did it before I started shaping the handle.

(That tenon saw is pretty ugly, I’ll admit, but it’s sharp and still cuts smoothly.) I had to be careful not to cut into bottom of the handle. Another good reason not to do the shaping first. As it turned out, my kerf was not precisely square, and I had to do a little extra work with the backsaw to get it straightened out. Soon after I made the saw, the kerf squeezed shut just a little, and I had to reopen it with my big rip saw.

Once I was satisfied, more or less, I got onto the fun part: shaping the handles. I don’t know what I would have done without my turning saw.
After some initial clean-up with a rasp and file, it was time to start rounding the edges of the handles. I used a spokeshave to ease the edges of the front handle, but the rear tote took a little more time.
Here are a few tricks that worked well. First, I marked out the profile as best I could. The template is excellent because it shows approximately where the rounding on the handle should begin. Once I had traced the template onto the wood, I cut it down to the inside lines, taped that cut-down template onto the handle, and traced it out.

Secondly, I used a marking gauge with a pencil to mark out where I wanted to stop the rounding. I just eyeballed the setting on the gauge.
Thirdly, once I had clear layout lines, I used a coping saw to take off a lot of the waste, which saved me a lot of rasp work. I try not to use a rasp where an edge tool will do the job. Coping saw blades are cheaper to replace than rasps are. If you were making a lot of these, I could see how a router would be very helpful. But for a one-off, the coping saw, rasps, and files worked quickly enough. Here’s the roughed-out handle:


I used two half-round rasps of different lengths/profiles, two matching files, and one aluminum file, plus a couple card scrapers. Those were excellent for cleaning up the file marks.
The last step in shaping was the bottom of the saw body, which I beveled on each side. That allows the sawdust to clear from under the saw. Here it is after some sanding:

Yep, works fine!

And with a little Danish oil rubbed out to a dull sheen.
It IS necessary to sharpen the saw before use, and I found that adding just a little set to the teeth prevented the saw from binding in cuts deeper than 3/16″.
If you want to try out a stair saw kit of your own, contact Dominic at dominicgreco@netscape.net
A Split-Nut Driver
Because the stairsaw uses traditional split nuts to squeeze the blade, I quickly found that I needed a split nut driver. Well, how hard could it be to knock out something like that?
I scrounged up a sacrificial spade bit and a piece of spalted pecan left over from the saw build. They should match anyway, right? An octagonal handle is very easy to make. Just square up the stock, plane down the four edges, and drill the center.
Let’s just say I tolerate metal working so I can do more woodworking. It helps to have a 9/32″ drill bit, which appears to be the standard shank size of spade bits. I had one a little smaller and one a little bigger, so I improvised. I drilled a stepped hole to be filled in with epoxy. A little more trouble, but no big deal.
I cut down the shank of the spade bit (those shanks are tough!), ground the point off the, and put a nice taper onto the end. Then I used the side of a file to cut the center slot in the end.
Apparently I drew the temper pretty effectively when I ground the point off, because the file cut the metal easily. I also ground a taper onto the tang so it would fit into the stepped hole. I filled it in with 5-minute epoxy, let it set up, and then finished it with a couple coats of Danish oil.

Soon I will post a short tutorial on using the stair saw effectively.

Steve …………. Thanks for the picture tutorial, very nice I really enjoyed that. That Pecan is really some nice looking wood. Also now I have an idea to make the split nut driver.
Thanks again !
Steve
I’m glad to hear it was a helpful tutorial. I hope you find your own kit soon! Later this week I will post the tutorial on how to use the stair saw, which I think you’ve already seen.
Pingback: How to Use a Stair Saw | The Literary Workshop Blog
Does Dominic have a web site so that I may order one?
No, but you can e-mail him at dominicgreco AT netscape DOT net.
Pingback: Essential Tools (to Me), part 1: The Stair Saw | The Literary Workshop Blog
I remember your stair saw from a forum 10 years ago!
I thought of making one from an old saw blade but then saw an item from Lee Valley I wondered if could be used instead. I’m not fond of working with metal. The item is the replacement blade for adjustable depth dozuki. I still think you’d need to fashion a handle for it as the straight dozuki doesn’t give any clearance.
What do you think of this, any red flags?